I've been doing well with making my Christmas cards the last couple of weeks, here's this weeks makes.
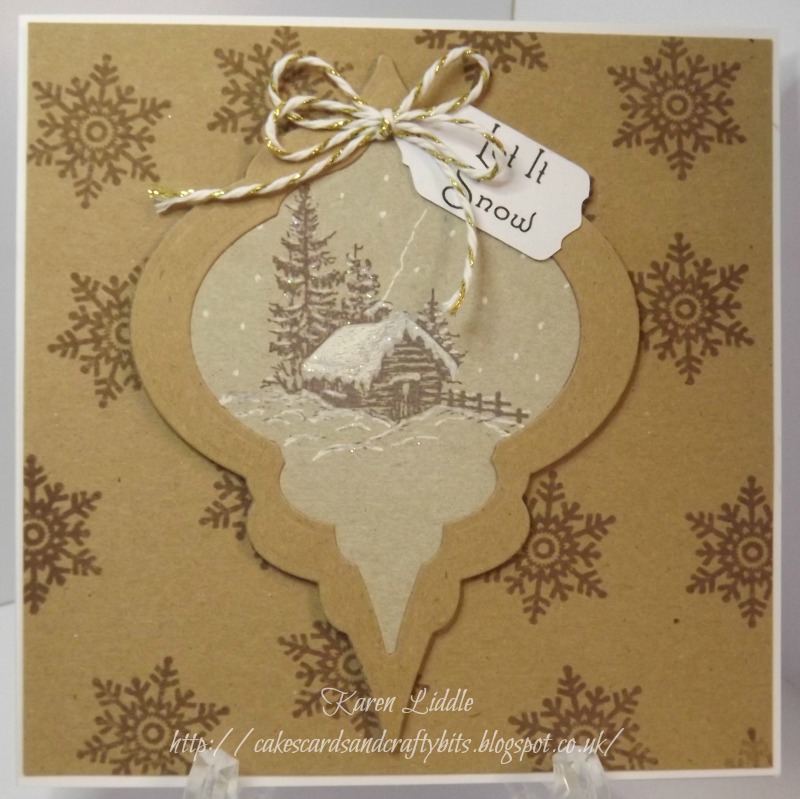
Well I'm still not too sure about Kraft Card or not...... hmm. I started off by cutting the shape with a die by Spellbinders, first I cut the full shape, then used 2 together to make a frame. Taking the full die cut, I blended white ink with a shaving brush, till I was happy with the depth of white. I then stamped the image with Memento Rich Cocoa, stamps from Inkylicious, and used a white gel pen to create the snow, which I then gave a bit of sparkle to with Glamour Dust, lastly I attached the frame cut and added the sentiment, which I made on my Cameo, and the twine bow. For the backing I simply stamped random snowflakes with the same colour memento ink.

This is my latest stamp from Penny Black, I do love there twiggy/tree stamps. I started this card by cutting a frame using the Sue Wilson Noble Pierced dies. I then stamped the image and heat embossed in white. Then I used Distress Inks in Stormy Sky and Chipped Sapphire and blended it with sponges and added the berries with Waco Pearl Maker (saves on gems..... lol). While the pearls dried I stamped the border using my Misti to line them up near as perfect as I could.... lol. The border stamps are by Phill Martin, and I love them! Once all dry I put the card together sticking the image piece straight onto the card, then place the frame using sticky pads to lift it just a little.

I made the frame the same as the card above. For the centre, I stamped and heat embossed the snowflakes using clear embossing powder. Snowflake stamps are by Sue Wilson, then blended Distress Inks in Shaded Lilac and Tumbled Glass over them, the clear embossing powder acts as a resist so the white from the card show through. Then I splashed a little water over the inks to create the little white spots. The card was then finished off the same as above.

I embossed the background first, then cut the frame using a die by Amy Design called Wintertide. I also cut a circle of card big enough to sit behind the frame. I stamped the trees in Versamark and heat embossed with clear powder, so I could ink over the image without it smudging. The tree stamp if from Inkylicious, I used shaving brushed to blend the 2 colours of Distress Ink, Tumbled Glass and Spun Sugar. I finished the card off with a sentiment made on my Cameo and some Christmas twine.

Again the frame was created the same way as the others. I masked off the image piece and blended Broken China Distress Ink. Then using the masks again where needed I stamped the trees and added some sparkle for the snow, again using Glamour Dust. The tree stamp is from a Penny Black,The card was finished of the same as above.


